45+ How To Change Pixels In Illustrator Cs6
2 Correct answers. Type PreferExternalManifest and then press.
How To Change Document Size In Illustrator
When using Filters you must change the raster.
How to change pixels in illustrator cs6. View The Pixel Grid. For example consider a document with both landscape width is more than height and portrait height is more than width media size. Alternatively Select your design go to Edit Edit Colors Recolor Artwork and change the hues of your selected object.
Adjust your raster effects settings in Illustrator. Select the objects you want to change click the Select menu point to Object and then click Not Aligned To Pixel Grid. For a document created in Illustrator Auto-Rotate is enabled by default.
This way Photoshop doesnt add any pixels. Open the image by right-clicking on it and selecting Open. Position the pointer in a word and double-click to select that word.
Shift-drag to extend or reduce the selection. Go to EffectsDocument Raster Effects Settings and either check high Quality 300 DPI or do a custom setting and use 355 dpi which is what the high end publications use. You may write in this field any size you wish in order to resize the image.
Navigate to the following registry subkey. With the semi-transparent image selected in Illustrator the Trim Image icon in the Rasterino Panel was selected highlighted in red to open the Trim Image dialog. Select the image to convert.
If you zoom in youll see that it looks crisp even if its in png or any other pixel-based format. Select the Auto-Rotate check box in the Print dialog box to set auto rotation for Illustrator documents. The defaults of Transparent Pixels and Preview remained selected highlighted in green.
Automatically the image boundary annotation shows the suggested image crop that will take place illustrated. You can adjust the size of the drop-down menu by selecting it. Adobe advice app Apple application brushes color CS5 CS6 design email Facebook font fonts free Google grunge icons Illustrator.
Position the pointer in a paragraph and triple-click to select the entire paragraph. HKEY_LOCAL_MACHINE SOFTWARE Microsoft Windows CurrentVersion SideBySide. Click on Tools in the menu bar to access the tools.
Open the image in Adobe Illustrator CS6. Select the object open the Transform panel and then select the Align To Pixel Grid check box. Enter a resolution in the Resolution text field.
Illustrator on File - Export - Select JPEG - and change the resolution to your desired resolution the default is 72ppi in the upcomming dialog box. In VIEW menu uncheck Snap to Point NOTE. If not available click the Options button and then click Show Options.
Right-click select NEW DWORD 32 bit Value. Then you can easily refill Live Paint spaces. Another way to change the document size is to drag the handles that show.
This will change the size of your page to whatever you desire. If you zoom in youll see that it looks crisp even if its in png or any other pixel-based format. Then make your pdf and that should do it.
Drag to select one or more characters. Deselect the Resample Image check box. The 72 dpi is a way of keeping the file smaller and have illustrator function faster.
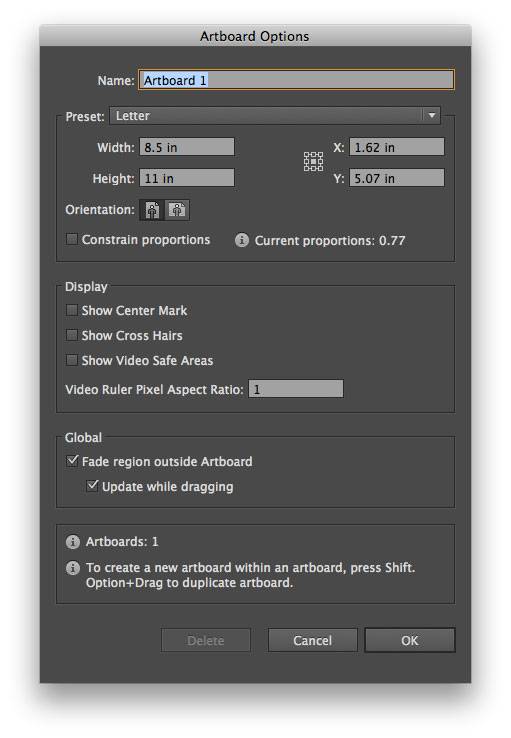
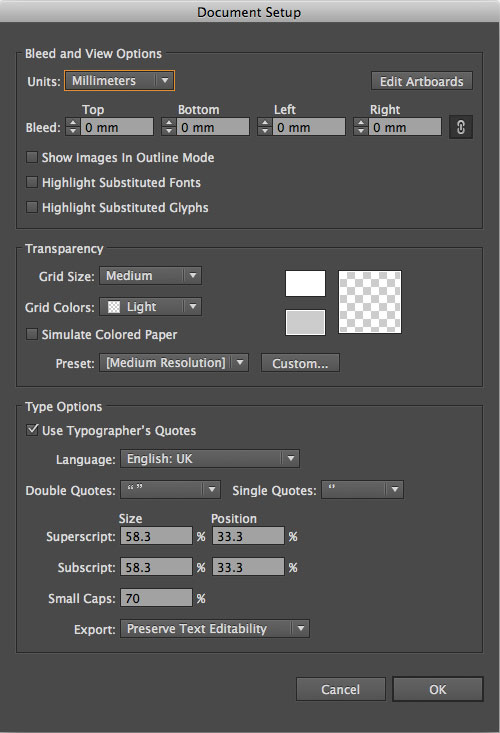
Firstly if your document is not currently using pixels as its default unit of measurement secondary click on the document rulers ctrlr to show rulers or go to File Document Setup. Open With followed by Preview is the alternative if Preview is not your default image viewer. Enter your revised values and select your required aspect ratio portrait or landscape here and click enter.
4 Move on top here is a control panel on the right you see so click on it the window will show up set the size in uniform field which you need for example 50. At the top menu bar go to File Open and then choose the file you want to open. The Image Size dialog box appears.
This has moved in latest version to Preferences menu see 3 below In the TRANSFORM PALETTE un-check Align to Pixel Grid. In this tutorial we will learn how to vectorize an image using Adobe Illustrator CS6 software. Illustrator on File - Export - Select JPEG - and change the resolution to your desired resolution the default is 72ppi in the upcomming dialog box.
In Adobe Illustrator the default for the output of those effects is a low-res 72 dpi. Prints at 300 pixelsinch are able to squeeze the pixels in close enough to keep everything looking sharp because they are so close together. The truth is 300 is usually a bit more than you need.
I find this to be the quickest. Ctrlaltp and change the unit to Pixels. Other related options in PREFERENCES -Disable Snap to Point.
Press Windows Button R type regedit and then click OK. One way of easily changing colors is to Copy Control-C and Paste Control-V the grid design before you extract your vector-based pixel art icon from the rectangular grid. In this tutorial we will use the image below.
Select any type tool and do one of the following. Watch how to change ui resolution photoshop cs6 Video. To increase the resolution of an image without sacrificing quality follow these steps.